About the Crop
Crop Name
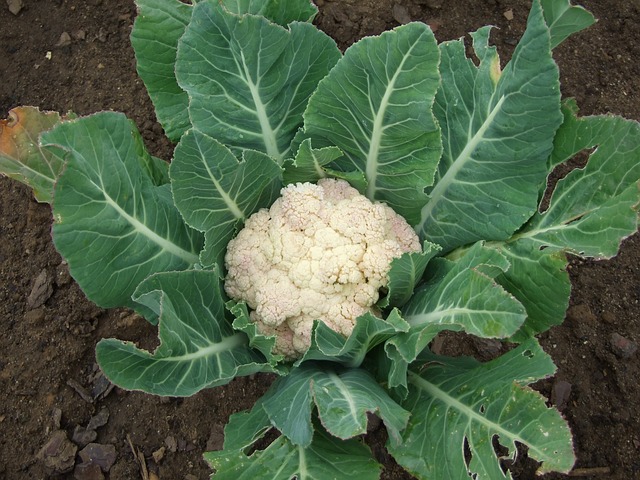
Cauliflower
Common names
Phool Gobi
Scientific Name
Brassica oleracea
Name in Indian languages
Phool Gobhi (Hindi), Hoo Kosu (Kannada), Phool Gobi (Marathi), PhulKobi (Assamese), Phula Kobi (Oriya), Phull Gobi (Punjabi), Fulevar (Gujrati), Phulkopi (Bengali).
Origin and Distribution of cauliflower
Cauliflower has a long history and is considered to be originated from North East part of the Mediterranean Region In Roman Times. The history dates back to as old as 6 BC but as per records it had its origin from Cyprus in around 12th or 13th century, post which three varieties were introduced in Spain through Syria. In middle of 16th Century, this vegetable was introduced to France from Italy. In 1822 it was introduced by British in India, and for the past 200 years Cauliflower is cultivated in India with its adaptability to the hot and humid tropical climate. Presently it is widely distributed across many continents. It is an annual vegetable which is distributed in countries like Spain, France, India, China, Pakistan, Bangladesh, USA, Mexico largely.
Area, Production and Productivity
India is one of the largest producer of Cauliflower. The major producers of Cauliflower in India are Bihar, Uttar Pradesh, Orissa, Assam, West Bengal, Haryana and Maharashtra. It is cultivated and is available from September to May in plains. In 2013 -14, the area for cauliflower cultivation was 4,34,000 ha, with production of 85,73,000 mt and productivity of 19.8 mt/ha. In 2014 the production was almost 85.73 Lakh Tonnes according to National Horticulture Database. Karnataka is the only state where Cauliflower is harvested round the year, however in rest of the states it depends on season. The production of cauliflower has tremendously increased from 1991 – 92 with 2,02,800 ha area under production to 4,34,000 ha production in 2013-2014. In 2014, West Bengal was the largest Cauliflower producing state.
Climate and Seasons of Cauliflower
Cauliflower grows generally during cold season, and requires optimum temperature conditions to produce the edible bud of the cauliflower. Cauliflower is now able to adjust to diverse range of climatic condition, mostly in temperate tropics and tropical parts. Since it is a cold season vegetable, optimum temperature for its growth ranges between 18 to 20°C, something required from vegetative to curding phase transition. The tropical variety although is able to grow even at 35°C. In temperate region, if the temperature is about 0°C, the young seedling growth may stop. If it is subjected to very high or low temperature, it tends to form small curds and also causes yellowing and raciness of the curd.
Soils
Cauliflower can adjust itself to almost all types of soil with good soil fertility and regime. For the early budding cauliflower light soil is most suitable but this requires optimum moisture supply as crops grown on light soil are generally drought tolerant. Generally during summers, the crops are grown in soil that has high moisture retain capacity as unavailability of water and moisture may affect curd formation. During winters, soils which dry rapidly after rains are preferred so that cultivation can be done in a proper way. Mid season and late maturing types can grow easily on loamy and clay loam soils. It is advisable not to grow cauliflower in high PH or acidic soil, as they are magnesium deficient and cauliflower has high magnesium requirement. Cauliflower is sensitive to boron and molybdenum deficiency and also is found to be sensitive to soil salinity. In short, cauliflower can be grown best in highly fertile, well drained with good retention capacity soil with a pH range of 6 to 7.
Varieties of Cauliflower
- Dania - This variety have medium sized curd and is stress tolerant.
- Early Kunwari – This variety has semi spherical curds with waxy bloom bluish green leaves. It is grown in parts of Punjab, Haryana, Himachal Pradesh and Delhi.
- Hisar -1 – It has medium to large size heads and grows in Haryana.
- Improved Japanese – This variety came from Israel and is unable to tolerate heat. It has bluish green erect leaves with compact curds.
- Pant Gobi 2 – They are harvested generally in the month of October or thereafter.
- Pant Gobhi 3 – It consists of 8 inbred lines and have relatively longer stem with semi erect leaves. The curds are hemi spherical , compact and creamy white in colour.
- Pant Gobhi 4 – They are medium sized plant with upright leaves. The curds are round and creamy white, with full riceyness.
- Pant Shubra – The curds formed are slightly conical and compact, which is creamy in colour, non ricey and non leafy. It is suitable for cultivation during rainy season.
- Punjab Giant-26 – This variety was developed by PAU, Ludhiana and formed solid white and medium sized curd
- Punjab Giant-35 – It forms curds which are medium in size, white and compact. It is suitable for late season cultivation.
- Pusa Aghani – It was developed by IARI, New Delhi. Curds are big, solid and white in colour and are harvested during November or December.
- Pusa Deepali – It is developed by IARI, New Delhi. It forms compact, white and medium sized curds with erect, short and green waxy leaves. Curds are ready in the month of October.
- Pusa Early Synthetic – Produced by IARI, New Delhi. The curds formed are medium sized, creamy, white in colour and compact. It forms bluish green leaves.
- Pusa Him Jyoti – It forms white, solid and round curd with bluish green leaves.
- Pusa Hybrid-2 – This variety has long and green upright leaves and covers the curd in initial stage. It is cultivated in humid Bengal Assam Basin.
- Pusa Katki – It matures in October or November and the plants have bluish green and waxy leaves. It is suitable for sowing in May middle.
- Pawas – It is grown from middle May to August and produces 700 to 800 g average curd weight.
- Swarna – It produces white and compact curds which are ready within 80 to 85 days of transplantation.
- Summer king – It produces curd which is whitish in shape and is ready fro harvest after 65 days of transplantation. It can be grown during summers in northern plain.
Crop Management
Field Preparation
Before growing cauliflower, it is very important that the soil and land is prepared optimally. In order make the soil fertile and good for cauliflower cultivation it is highly recommended to mix manure or compost to a depth of 15 to 20cm. After preparing the soil with compost, it can be treated for root knot nematode for better cauliflower productivity and after 2 to 3 weeks, plantation of cauliflower can start. The soil is prepared by adding manure or compost to the soil at ratio of 10kg/m2, which is followed by ploughing or digging in order to break the soil clots. After that the soil bed is sterilized by formalin treatment and it is ready for transfer of the transplants after 15 to 20 days. Once the soil is treated with formalin it should be kept covered by polythene for a week and after that the beds are dug again and left open for 5 - 6 days. This treatment minimises any harmful effect by formalin to the seeds. Formalin treatment prevent fungal attack.
Propagation
It is very rare that cauliflower seeds are sown directly in the field. Instead cauliflower is grown in controlled condition in green house and the transplants are transferred to field after few weeks. Once transplants are ready, furrows are formed where they are grown.
Sowing, Nursery and Transplanting
Before the cauliflower seed are sown it is very important to prepare the nursery with optimum growth conditions. Generally for one acre of cauliflower seedling, a nursery of 40 sq m is enough. A protected nursery is to be created where half of the nursery should be covered with shade nets and the sides covered with 40/50 mesh insect proof nylon net.
The seeds are sowed in portrays for seedling formation should be conveniently spaced. In order for germinating the seeds, it requires a specialised growing medium which is formed by mixing sterilized cocopeat @ 288kg/ac with neem cake of 10kg and 1 kg each of Azospirillium and Phosphobacteria. The portrays are filled with the cocopeat mixture and the soil preparation and seeds are sown.The portrays are than kept on top of each other and are covered with material like polythene or dry grass so that it gives optimum water only. After that within 5 days the germination starts and the grass or polythene cover can be removed once the sprouts starts to grow. In order to protect the small early seedling from high temperature and rain, it should be covered and shaded. After seeds are germinated, the portrays are arranged on raised bed in the nursery. It is important to water the trays everyday and also drench with 19:19:19 + MN in the ratio of 5g/l. Within 3 – 4 weeks the transplants are ready. In early crop the seeds are sown in May to June and late crop seeds sown in September to October in nursery. For mid crop or main crop seeds are sown in July to August.
Seed Rate
The seed rate depends on the season. In case of early crop an average requirement is 240 to 280 gm/ac and for late crop requirement is 180 to 200 gm/ac.
Seed Treatment
There are various ways to treat the seeds before sowing them. It is important to treat the seeds so that it gives high mortality rate and better productivity.
- The seeds can be treated with hot water at 50°C for 30 minutes. It should be followed by a treatment with 25g of Azospirillum for 250g of cauliflower seeds.
- Seeds can also be treated with Bavistin or Thiram in ratio of 2g/kg of seed.
- Now a days seeds of cauliflower are pelletized and the pelleted coatings allows better germination. The seeds are covered by powder mixture forming a ball making it uniform and easier to handle during sowing.
Transplanting
Within 3 -6 weeks of the seed sowing, seedlings are formed from the seeds and are ready to be transplanted to the field. The transplantation depends on type of crop where in early crop seedlings which are 5 - 6 weeks old are better and 3-4 week old seedlings give better productivity in case of mid season crop. Once the seedlings are grown, it is to be ensured that it gets enough daylight but not much heat. It is important to properly water the seedlings before transplanting them to field. Also in order for the germinated seedling to adjust to the outside environment it is important that it is gets used to outside temperature and conditions through hardening process where it can be kept in mini green houses with optimal conditions. After appropriate time, we can transplant the seedling to the already prepared field. Furrows or hole in the soil can be made and the seedling can be planted firmly which needs to be watered after that. It is advisable to plant the seedling in a cold day or in evening to prevent wilting.
Spacing
The germinated seedling should be transplanted to the field and an optimal spacing is required so that each one gets proper nutrients. The spacing depends on the type of cultivar. They should be placed in single rows with a distance of 45 × 45 cm for early crop and for late crop the spacing is 60 × 60 cm. Or else the spacing in case of seeds should be 35 to 50 cm apart in rows which are 60 to 90 cm apart.
Water Management
Water Management is very important for efficient and proper growth of cauliflower. The water requirement differs according to the stage and type of cultivar. It is necessary to water the crop every 4 to 7 days if it is an early planting and in case of late crop it needs to be watered every 10 to 15 days. Since the plant require moisture, it should be optimally maintained in the field. Drip Irrigation or sprinkler can be one of the most effective ways to keep the plant moistened and well hydrated as well as protect it from very high temperature.
Nutrient Management
In order to ensure proper growth of cauliflower, their nutrient requirement is always to be considered with top priority. The soil fertility level needs determined and accordingly nitrogen, phosphorous and potash need provided for its growth.
- Approximately an amount of 52 to 68 kg/ac of nitrogen is required for proper cauliflower production. Initially nitrogen is used with soil before planting, followed by seconds application of nitrogen in 7 to 10 days of planting. A third time nitrogen application can be done in case of very moist season. Nitrogen produces dark green leaves.
- Phosphorous is one of the necessary requirement for cauliflower growth as it helps in root development and its deficiency might lead to slow growth and delayed maturity. In case of soil of less than 50 ppm, one can apply 18 to 36 kg/ac of P2O5. In areas of lower phosphorous, P2O5 at 68 to 135 kg/ac can be applied.
- Magnesium should be applied so that it doesn’t face interveinal chlorosis. Various sources of magnesium like sulphate of potash magnesia, Epsom and Dolomite lime can be applied to the field.
- The Cauliflower plant also require certain micro nutrient for its efficient and proper growth. If it is deficient in Boron, it may cause stem discolouration, leaf rolling, deformed buds, cauliflower browning etc. Sodium borate can be supplied for maintaining boron deficiency. Manganese chelated and sulphates can be applied for maintaining manganese level as its deficiency may cause leaf yellowing. Molybdenum deficiency may cause whiptail which is deformed formation with no head and thus sodium molybdate can be supplied for addressing the deficiency.
Weed Management
It is very important to check the growth of weeds and needs an efficient management as they complete with the plant for nutrient and delay the growth and maturation of cauliflower. Weeds are home to many insects and nematodes and thus might reduce the efficiency of any pesticide application. Weed management can done by both cultural and chemical practices. With practices like crop rotation, hoeing and stale seedbed, weed seed production is reduced and thus makes the land efficient for cauliflower cultivation. Through the technique of stale seedbed, planting bed is prepared early by watering and allowing the weeds to germinate post which they are controlled via herbicide (Glyphosate) or by flame weeder. Hoeing can be used to control weeds that grow in close proximity to the plant. Some examples of summer weeds are pigweed, purslane, lambsquarters and ground cherry which grow August - October.
Pests of cauliflower and their Management
Cauliflower is affected by many different types of pests.
- Cabbage Maggot
It lays egg on the stems of the crop and their larvae enters the roots and feed on the plant tissue. Due to this decay micro organisms enter the roots leading to early death of the plant. In order to control manifestation by this pest it is important to maintain high number of natural predators like rove beetle, harvestmen, ants, ground beetle etc in the soil. In order to prevent the plant from flies which lay eggs on the it, the plant should be covered with a cover. The plant can also be grown with any legumes so that the flies are unable to find open ground near its stem. - Caterpillar Pest
There are different type of caterpillar pests like cabbage worm, cabbage looper, diamondback moth and purple backed cabbageworm. Cabbage worm are the most common caterpillars on cauliflower plant. Cabbage looper causes more problem during summer season. The diamondback moth is a smaller insect with can bore holes in the cauliflower head and they hardly survive during winters. There are high number of natural predators like ground beetles, damsel bugs, assassin bugs, big eyed bugs, lacewing larvae etc which needs to be maintained in the soil in order to protect the plant against the above pest. Apart from this there are other ways also to prevent attack by these pests like evening overhead sprinkler irrigation, pheromone emitters that disrupt mating and covering the plant to avoid laying off eggs. - Cutworms
These pest attack the seedlings in the plant bed and greenhouse. As a control measure we need to prepare the soil almost 2 weeks prior the cultivation and the plants needs to be checked regularly for any damage. - Aphids
They are most common pest and are small and slow moving insects, which are found in colonies under leaf surface. Aphids feed by piercing the plants. By maintaining high number of natural predators of aphids in the field, their attack on the plant can be controlled. High pressure sprinkler irrigation is used to kill the insects and also intercropping may also help in preventing pest manifestation. Some of the aphids are green peach aphids and turnip aphids that damage the crop. Generally organophosphate compounds are used as chemical control for aphids. - Thrips
They puncture the leaves by feeding on them leading to dark warts appearance on the leaves and they also damage the curds by feeding on them. It is important to control thrips population at early stage and if forage surrounding it is cleared heavy migration by thrips can occur. - Flea Beetle
They can damage seedlings and transplants and also the plant. It can be controlled by a parasite called braconid wasp which kills adult flea beetles. The young seedlings can be covered with a cover to prevent insects from attacking. - Tarnished Plant Bugs
They appear in all seasons, which feed on cauliflower curds causing it to brown. They can be prevented by proper weed treatment. - Slugs
They generally feed on the leaves and prefer cool and moist area. In order to reduce attack by slug, a strip of forage needs to be cultivated around the cauliflower and spray of urea on the strip may prevent the attack.
Diseases of Cauliflower and their Management
Cauliflower is prone to many different types of diseases and thus in order to increase their productivity and decrease the mortality rate, it is very important to control these diseases.
- Club Root
This disease causes swelling and malformation of the root which restricts nutrient and water flow in the plant. The club root fungus enters the plant through roots. It is very difficult to curb the infestation by this disease, as it continue to infest on the land for a longer duration. When the plant rot, the fungal spores are released in the soil which may live for 10 to 20 years and infect other plants. There are few steps to control it.
* It is important to avoid planting the plant in infested field for nearly 7 years.
* We need to avoid using the fungus infected manure to avoid the crop infestation.
* It is important that we use crop rotation and field rotation. We need to ensure that all the equipments are clean and disinfected before using on non contaminated land.
* Proper Weed Management is very important so that it does not increase the level of manifestation.
* Application of lime to maintain pH of 7.2 is important to prevent attack by fungus. In order to make sure that the transplants are clubroot fungus free, transfer the transplant in sterile soil. Also we need to make sure that we don’t plant the infected plant with the healthy ones. - Downey Mildew
It is caused by Peronospora parasitica fungus and infected plant shows white fuzzy patches on head, leaves and stems and also causes browning of the curd and leaf. This fungus is able to survive for 2 years approximately. It is very important to control this disease which can be done by crop rotation with any other plant and also by treating the field with plant debris. - Black Leg
It it is caused by fungus Phoma lingam. Symptoms can be recognised with spots on the stem along with purple border. The plants may ultimately die from wilting. It can be controlled by hot water treatment of the seeds as well as 4 year crop rotation is highly effective in crop rotation. - Grey and Black Leaf Spot
These diseases are seed and soil borne identified by small spots on the leaf and forms a hole like appearance. This disease is favoured by cold temperature, high humidity and rain and decays the cauliflower. Grey Leaf Spot and Black Leaf spot is caused by Alternaria brassicae and Alternaria brassicola respectively. It can be controlled by by treating the seeds with hot water. It can also be avoided through long rotations and can also be incorporated by debris incorporation. - Black Rot
It is caused by Xanthomonas campestris, which is favoured by rain. It causes yellowing of the tissue. It can be controlled by treating the seeds with hot as well as crop rotation. - Damping Off
It is caused by Rhizoctonia Solani and is a soil borne fungus disease which attacks the seedlings. It generally does not affect plants that reached three to four leaf stage. In order to control spreading of this disease, the field needs to be ploughed properly before planting cauliflower. It is important to avoid over watering of the field. It is important to take care that the plants are not stressed.
Organic Cultivation
It is not easy to organically cultivate cauliflower in gardens because it requires many optimal conditions for its growth.
Harvesting and Yield
Once the curds are fully developed, compact and before they become ricey, they are harvested. The curd must be in good shape, globular, firm and white, yellow or purple in colour depending on cultivar. In order to protect the curd, it is advisable to harvest it with its full foliage. The maximum size of the curd may be up to 30 cm depending on the cultivar. Physical damage should be minimized during handling to avoid browning of the curd. Generally, the harvest begins in late July and ends in October. It is generally harvested with manual precision using a knife. It gives us a yield of almost 80 – 100 quintal/ac for early cauliflower and for late season crop, yield is approximately 100 – 120 quintal/ac.
Marketing
Cauliflowers are generally out in market for general sale in November. In the pack shed, the leaves are trimmed and uniform sized heads are packed in cardboards. Either they should be sent to market directly or should be kept in storage at 2o C. Proper handling is essential as the curds are sensitive and mishandling will lead to loss of the vegetable.
Post Harvest Technology
There are various steps for post harvest handling for proper retention and marketing of good cauliflower.
- Sorting and grading, generally harvesting is done manually beginning in December with heads of approximate size of 15cm. Sorting is done by removing the spreading leaves and trimming leaves wrapping the head and after that it is packaged. If it is packed in perforated plastic, carton is cooled by hydrovac and carton is cooled by hydrocooling if head is wrapped by plastic. After that the cauliflowers packed in cardboard box, are shipped to packing house where they are checked for any defects, trimmed and mildly treated with chlorinated water before final packaging.
- Packaging, after all the checking it is packaged in cartons with almost 12 per carton with most of them packaged in perforated film. There should be holes in the plastic for ventilation.
- Storage, cauliflower requires low temperature of 2o C and relative humidity of 95% for storage. The temperature for storage varies with number of days the cauliflower needs to be stored. Storing under proper conditions prevents decay, spotting and aging or curd browning. When the cauliflower is to be held outside temporarily of cold storage, it can be packed in crushed ice to keep it fresh.
In order to remove the field heat, both hydrocooling and vacuum cooling method are very effective. Make sure that ice is not used on it. Cauliflowers that are to be stored should be cut in slightly immature stage so that the curds don’t separate.
Click the Share button below to create a new linked topic for questions and discussion.